Your own electronics lab... in a tray!
December 18, 2021 • article
Maybe you're not sure yet if electronics is the right hobby for you, so in this article I want to show you how you can set up your own electronics lab in a tray! It has adjustable power supplies, a PICkit3 programming adapter, a volt and ampmeter, and even a little logic probe. And the best part: it doesn't take up a lot of space, you can get everything for around $150, and if you don't need it anymore you can just tuck it away under your desk!
Main idea
These office under-desk storage drawers are quite cheap, they come in different sizes, and they even have some compartments for organization:
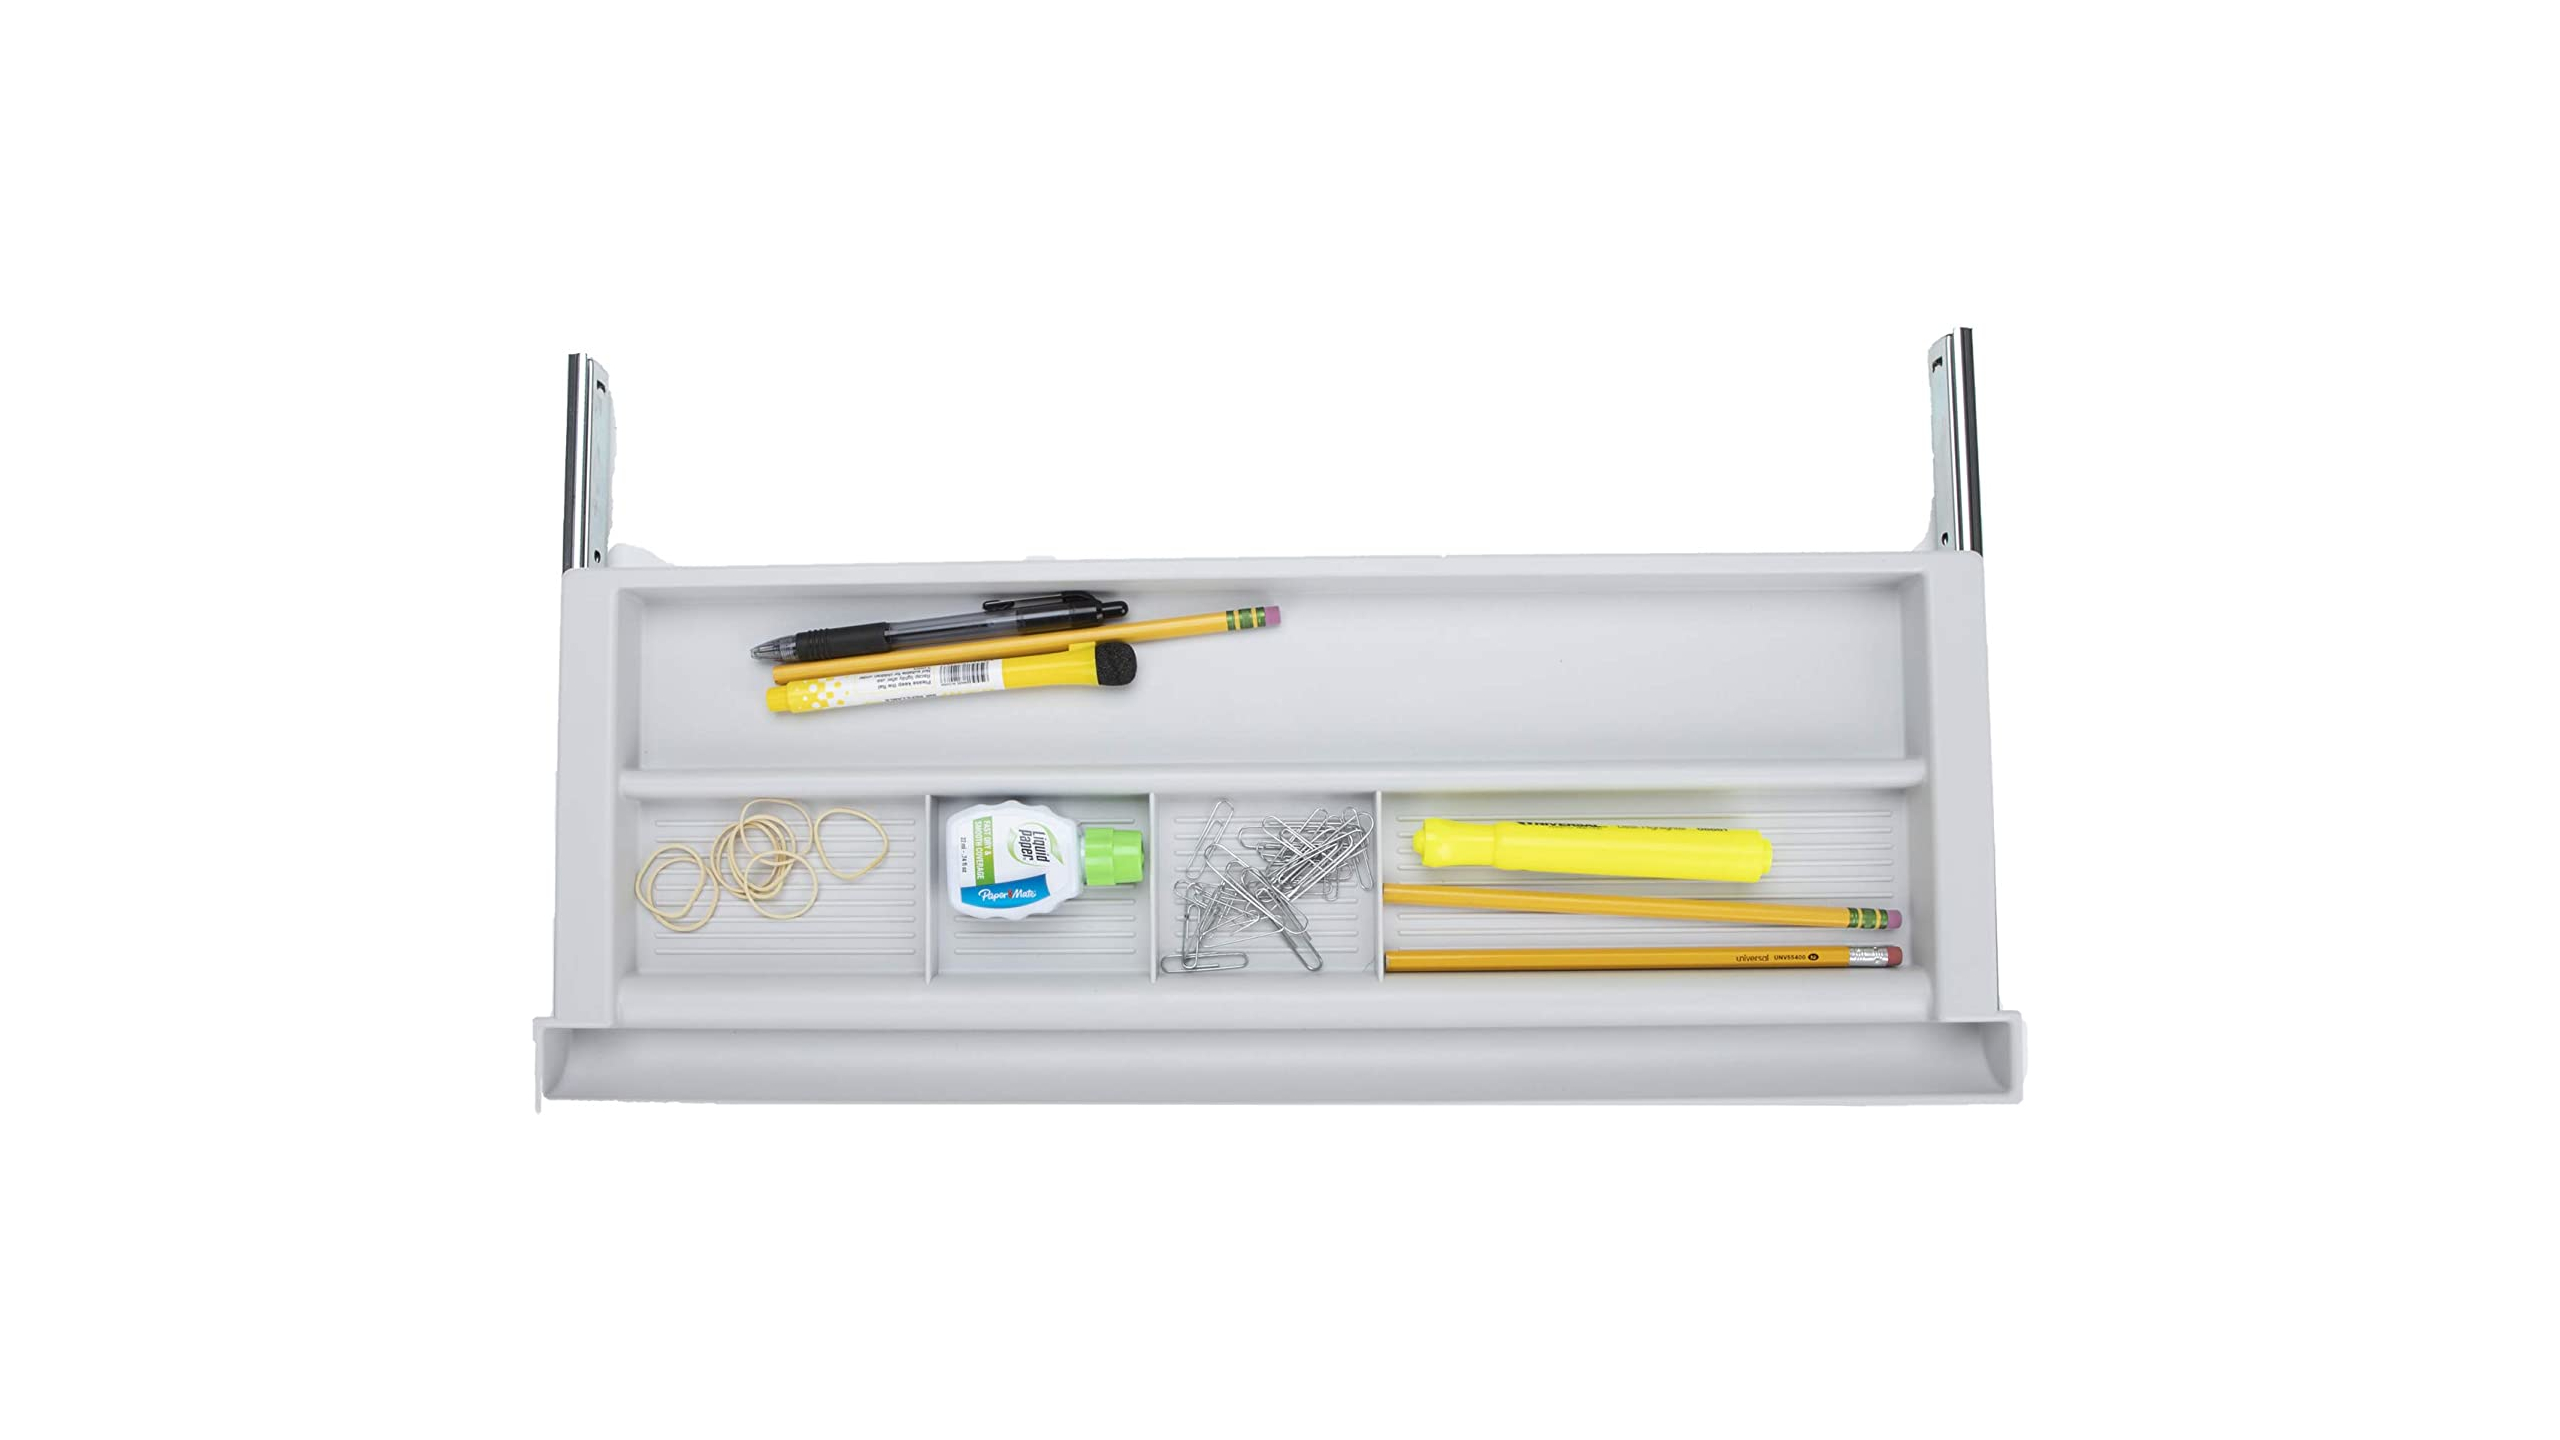
The main idea for the tray lab is to use one of those office drawers and instead use it as a little lab:

In this photo you can see the final result (I only omitted the USB cables so it is easier to see what's what). This lab is based around a USB power hub that is connected to power supplies and the PICkit3, which allows you to follow all projects and tutorials on this website. The compartments fit several sizes of breadboards very easily. Also, the front lip provides convenient storage for additional tools, like a logic probe. So in the rest of this article I will go through all those components to help you set up your own lab inside a tray!
Also check out the YouTube video as well as the components box for links where you can buy all of the equipment that I mention in this article.
USB hub
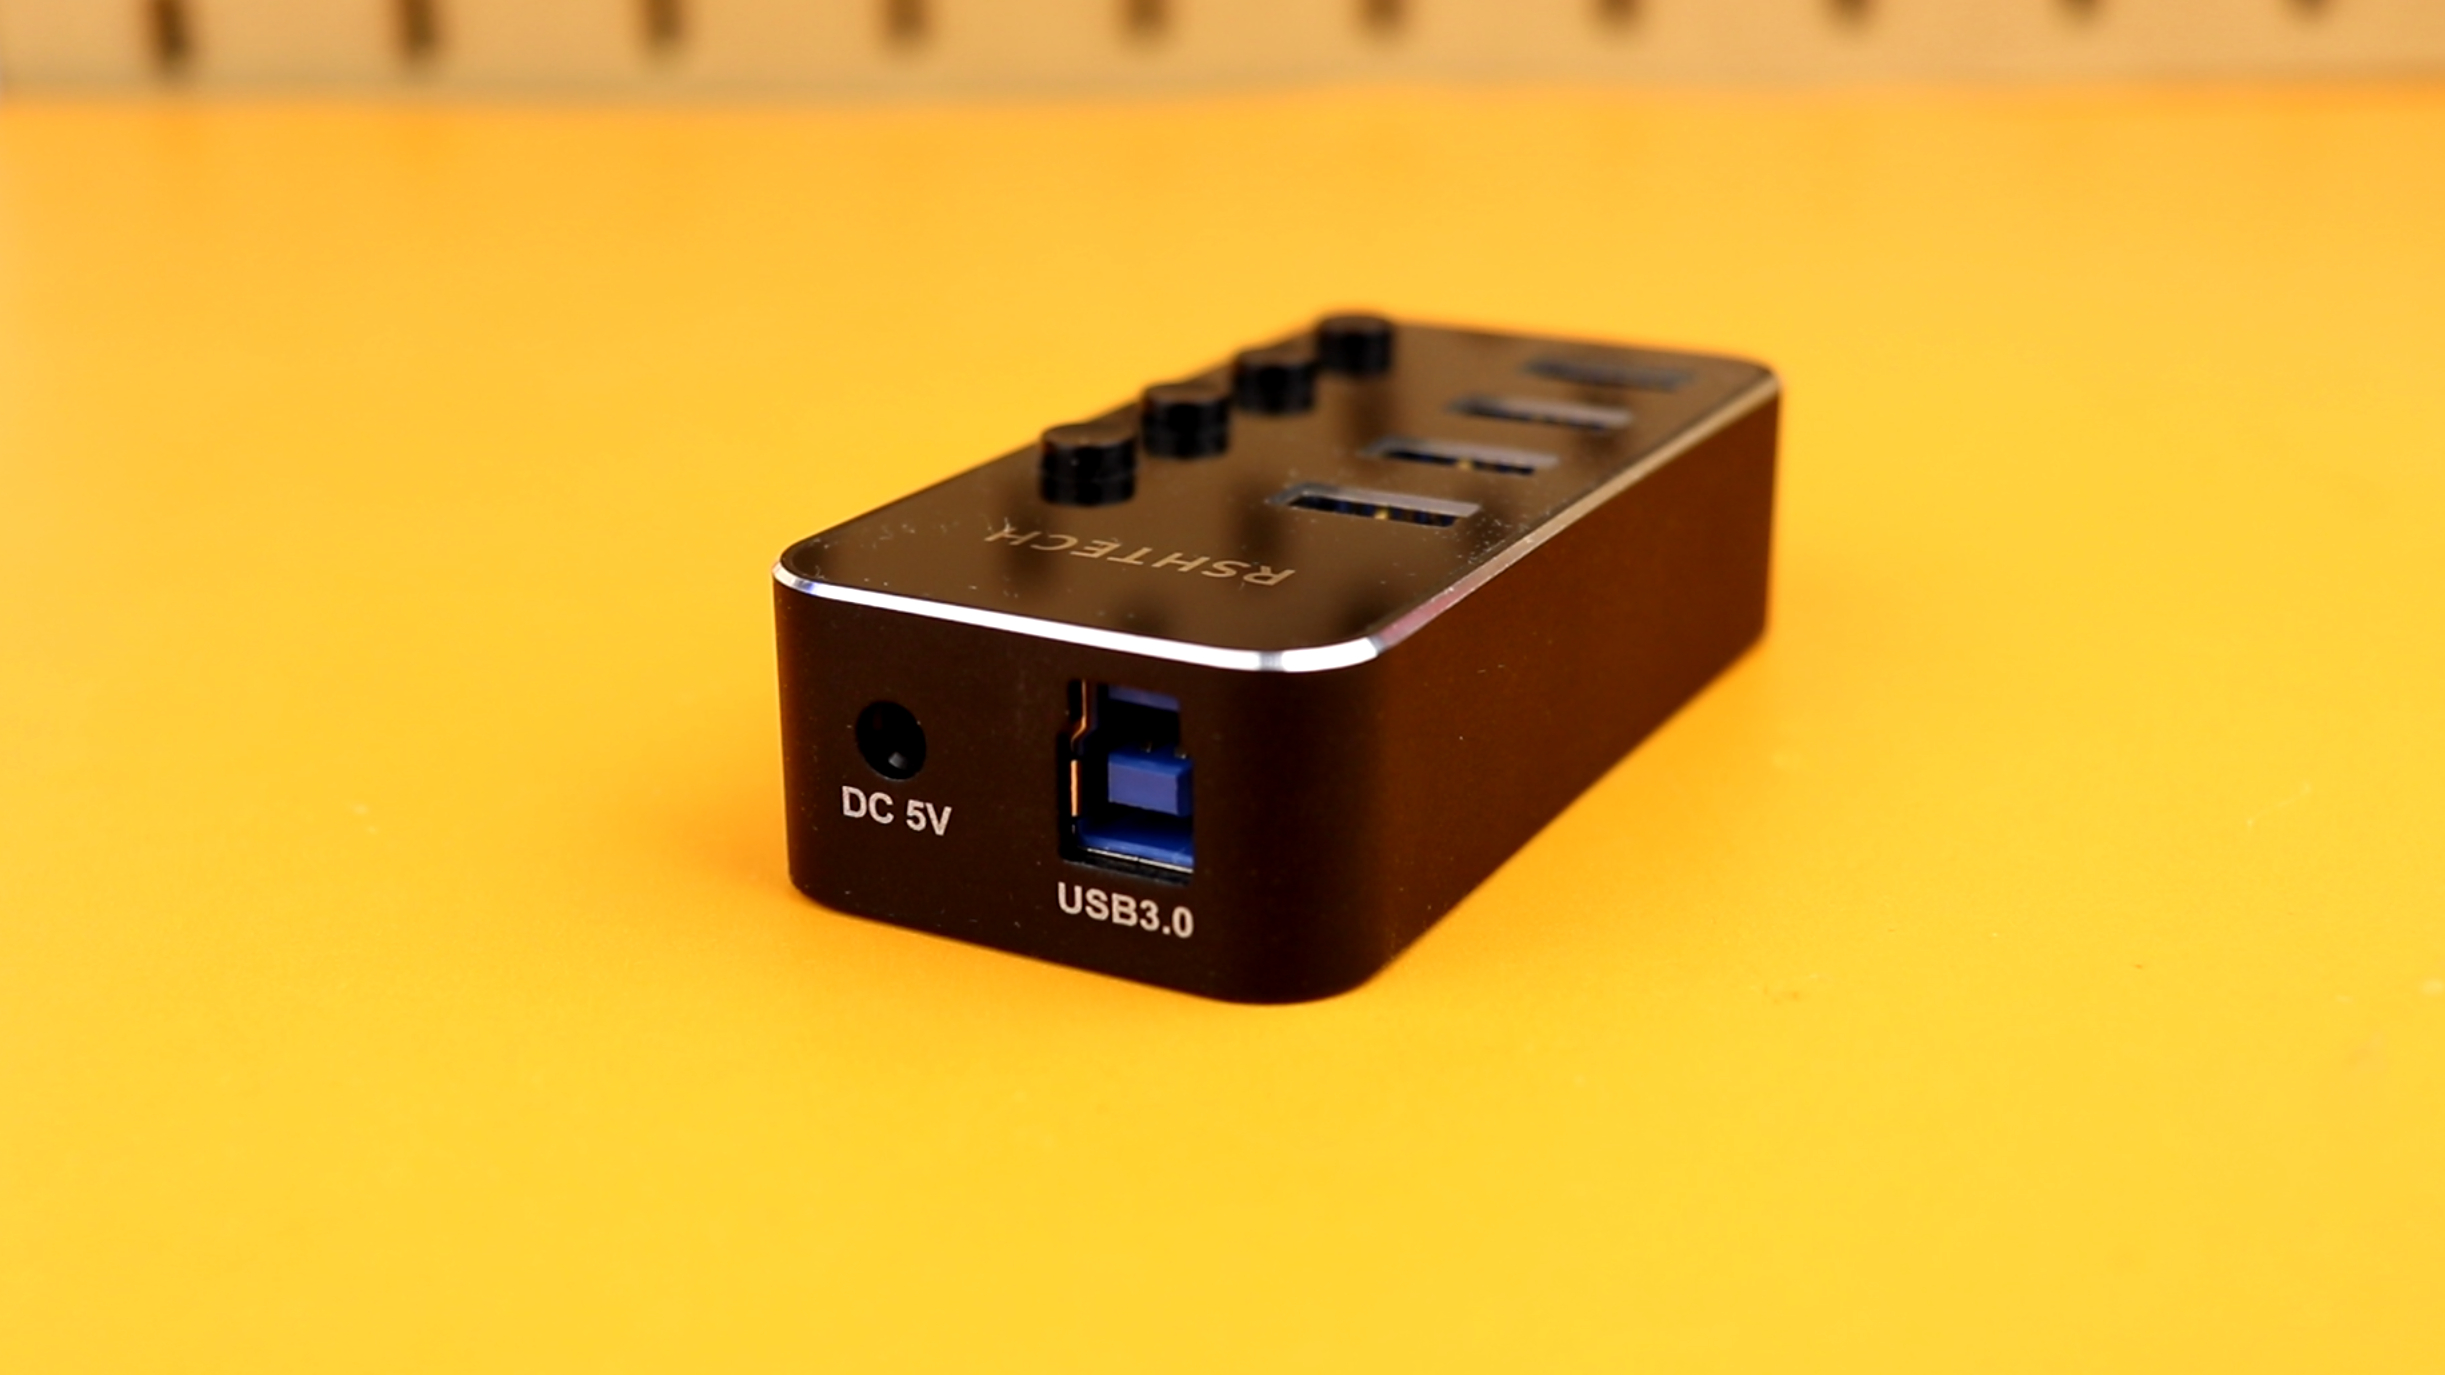
The USB hub is the main entry point of power into the tray lab, so I recommend to get a good one that has a dedicated power supply input, that way your computer does not have to provide all the power on its own. Also, it will provide us with a data connection, so that we can plug in a PICkit3 to program microcontrollers, more on that later.
And also make sure that the USB hub is switchable. It is very convenient to be able to turn off a USB port with a button instead of having to manually disconnect the cable. Here you can see such a USB hub:
And it's also important to have good USB cables available. I went with these coiled ones here, because I think they look cool but also because they don't take up a ton of space:

The final choice of USB cables of course depends on the type of equipment you want to connect to.
Power supplies
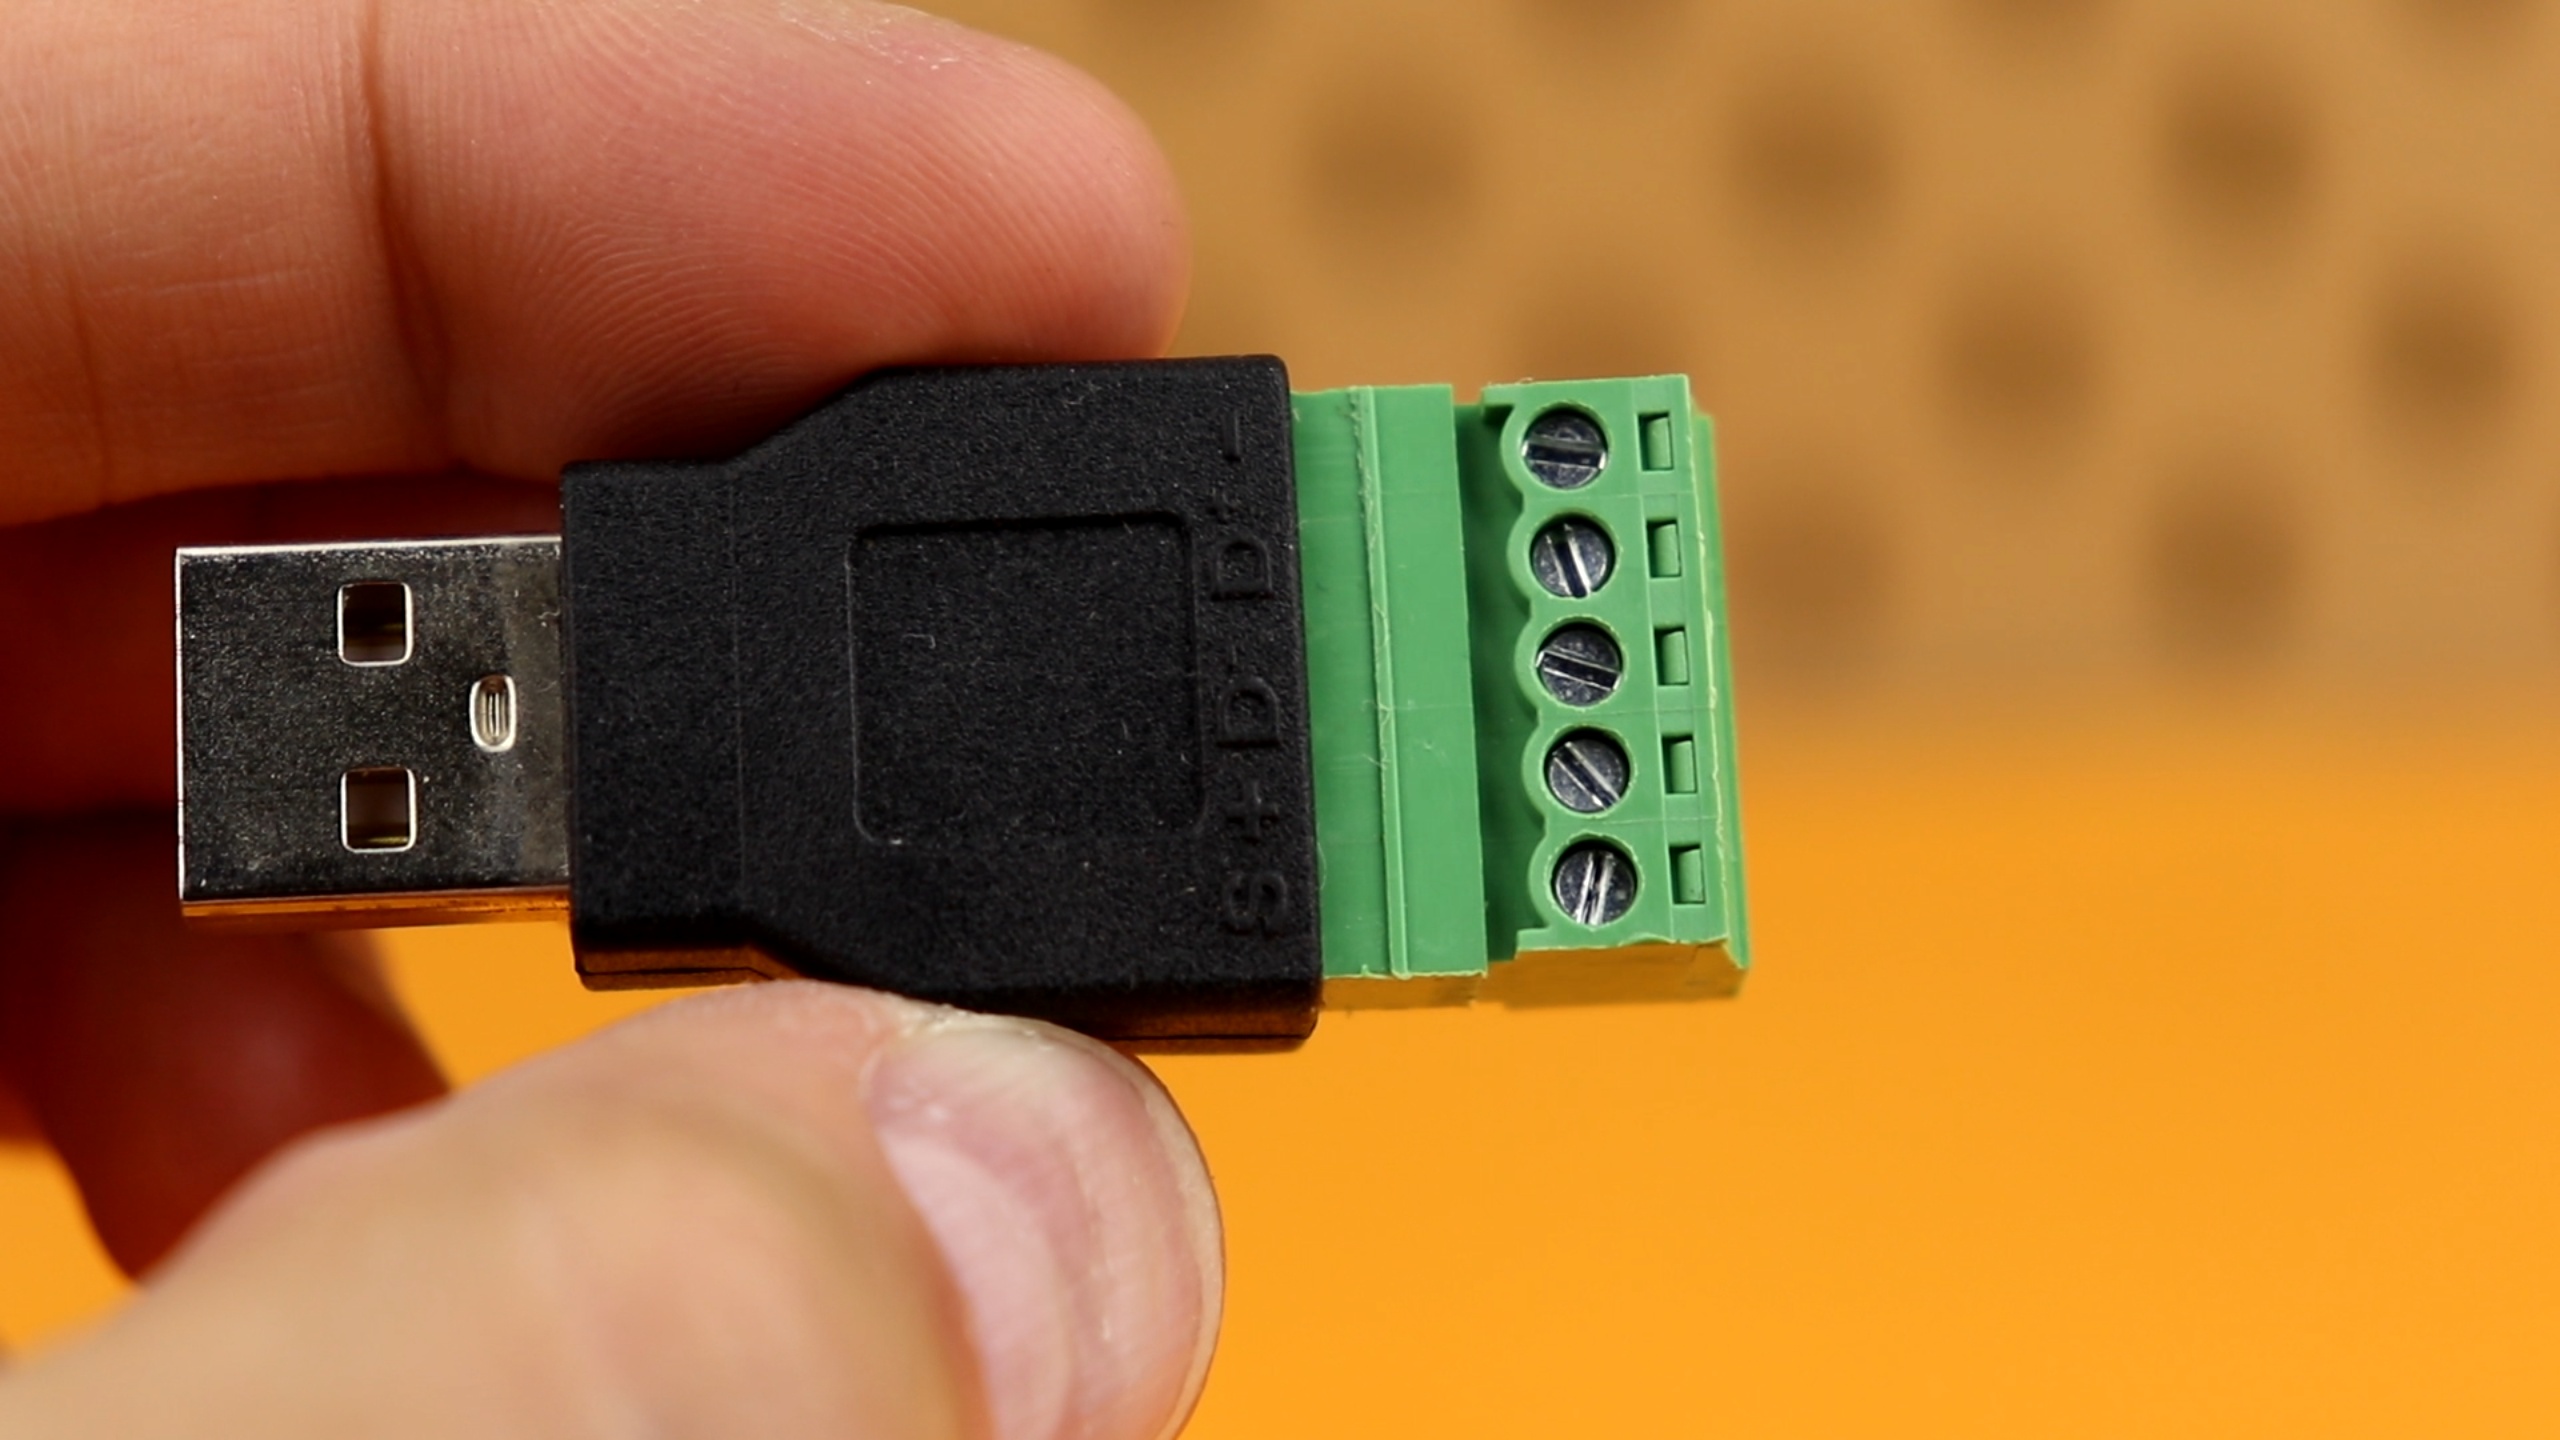
In the simplest case, if you only need +5V, you can use a USB breakout adapter like this one here to directly access the +5V from a standard USB cable, simply connect two wires to the + and - terminals:
Another alternative is this style of USB breadboard power adapter that plugs right into the breadboard:
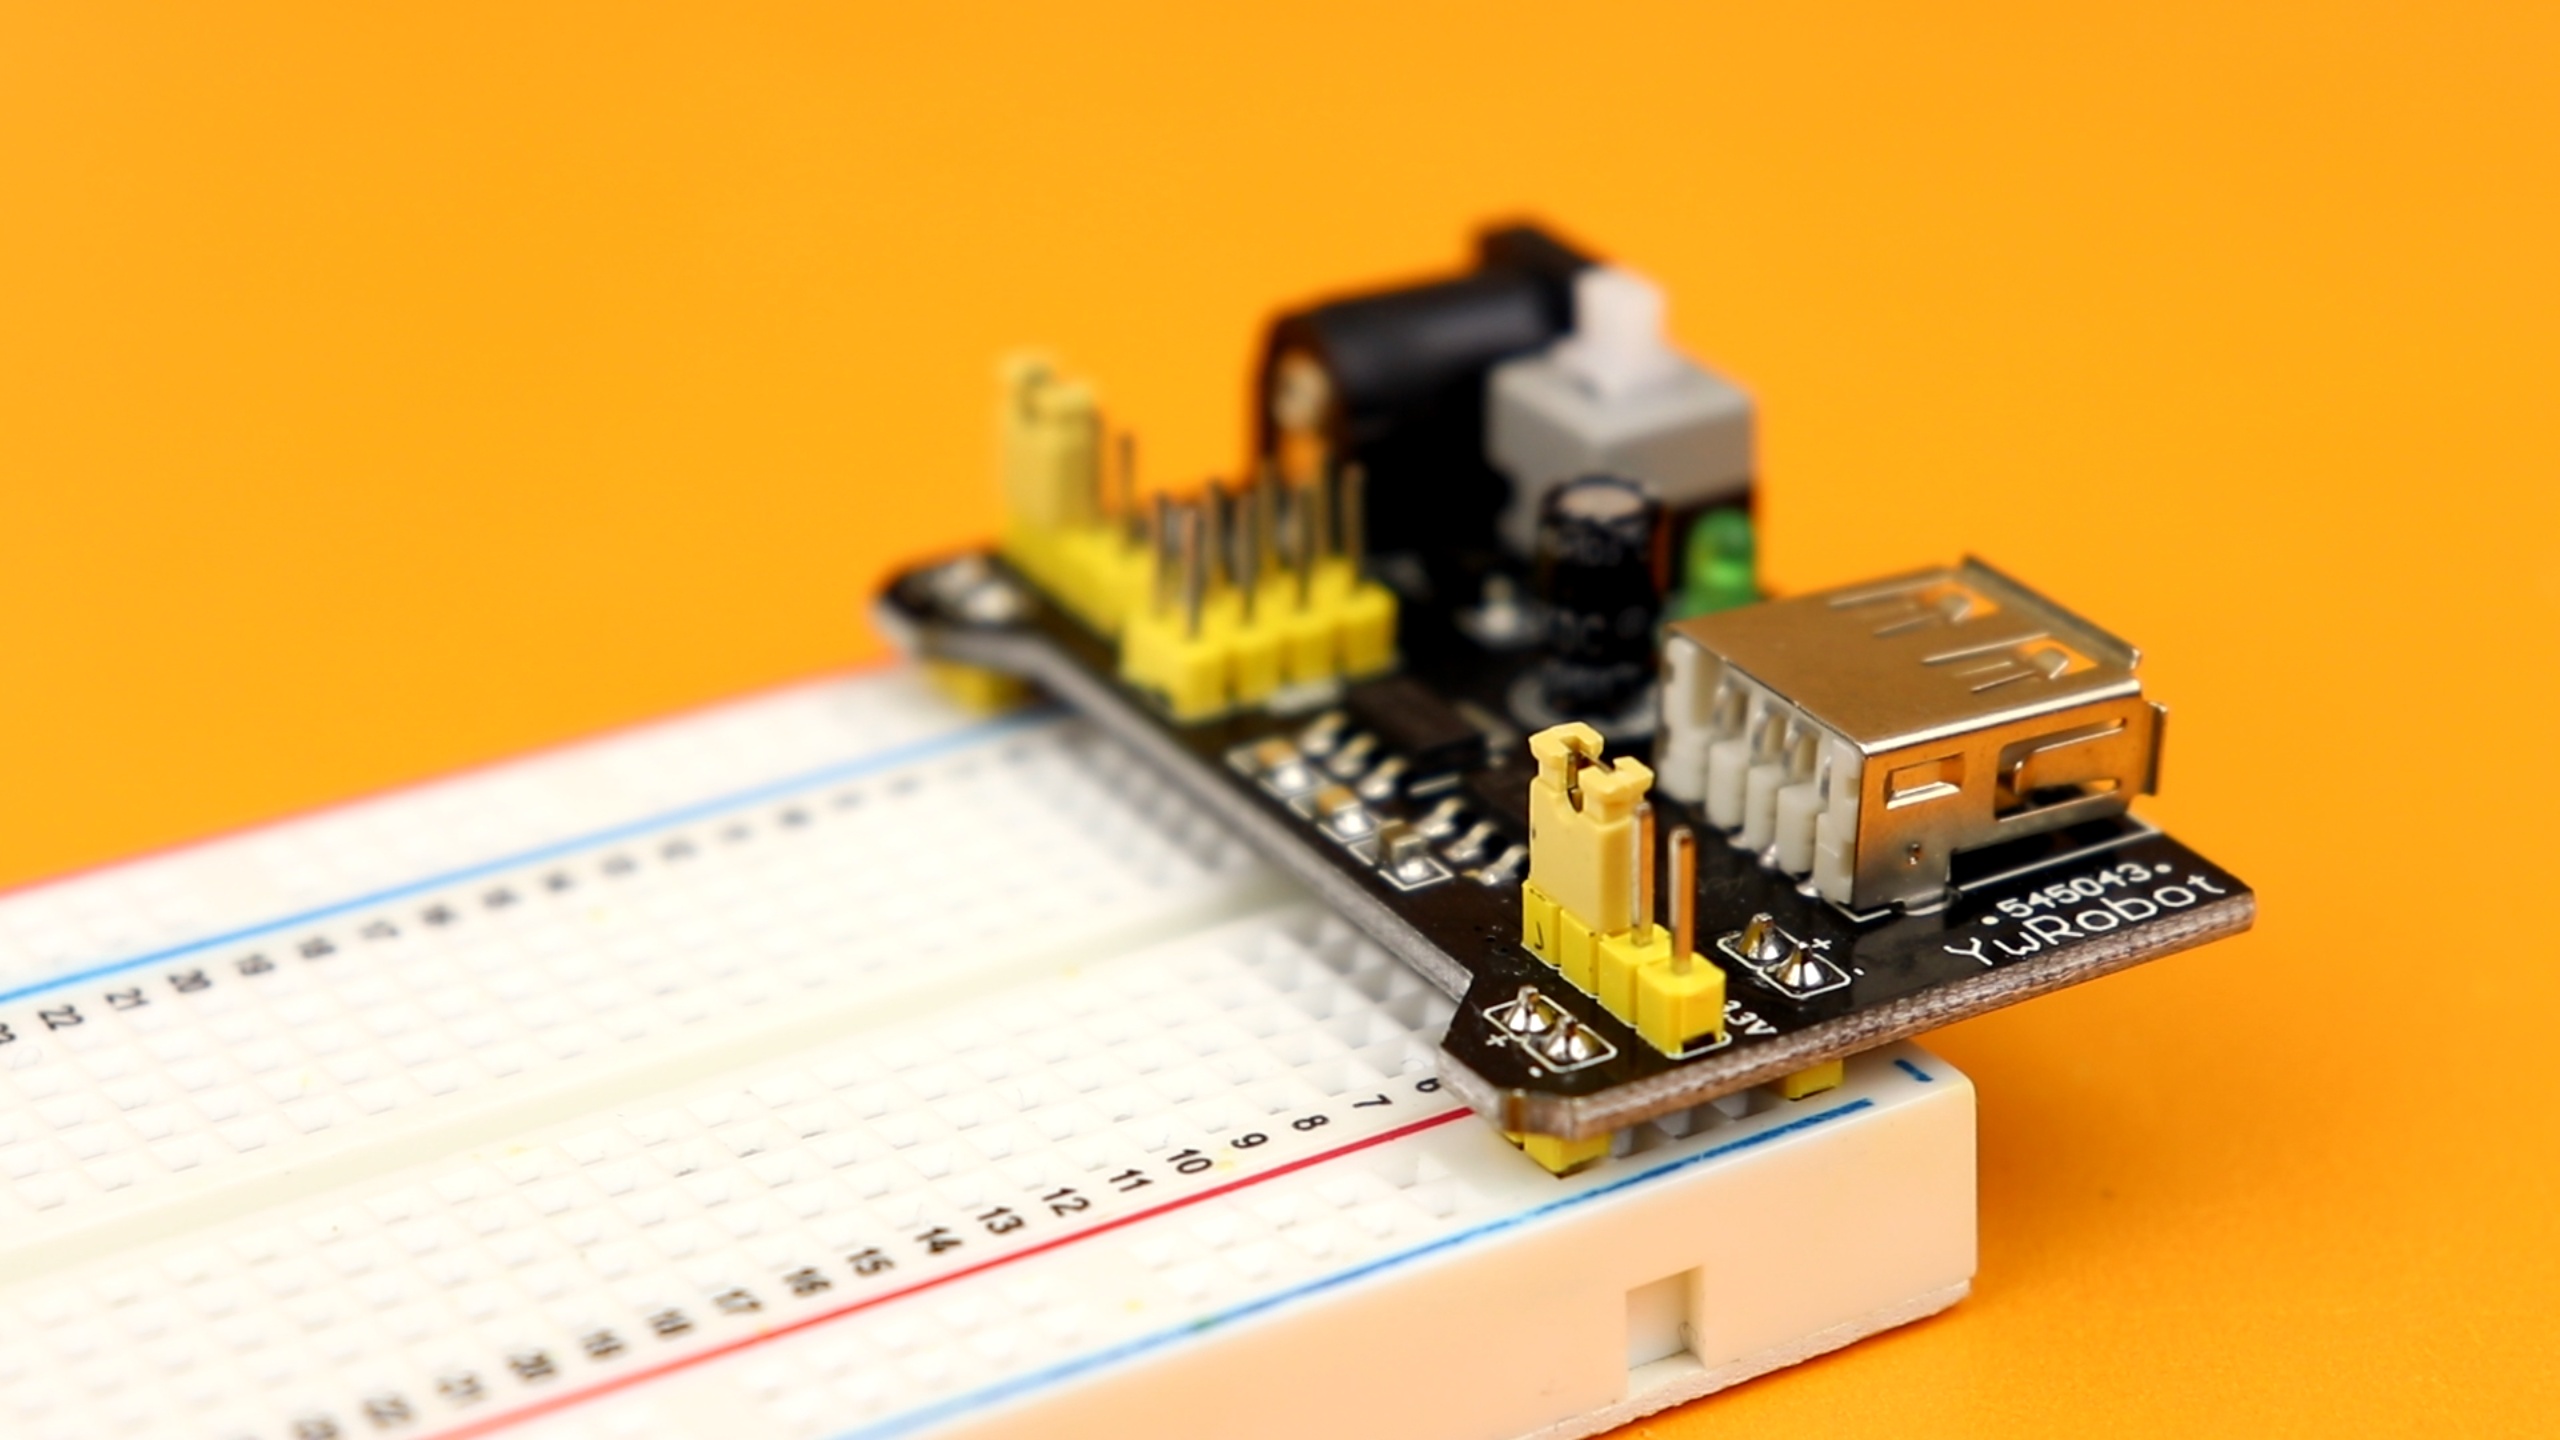
And if you look closely, you also see the option to set the voltage to 3.3V instead, with a jumper, which can be useful sometimes:

But what if you need a different voltage, say, 6V, or 9V, or even 12V? In that case we need an adjustable USB power supply like this one here:
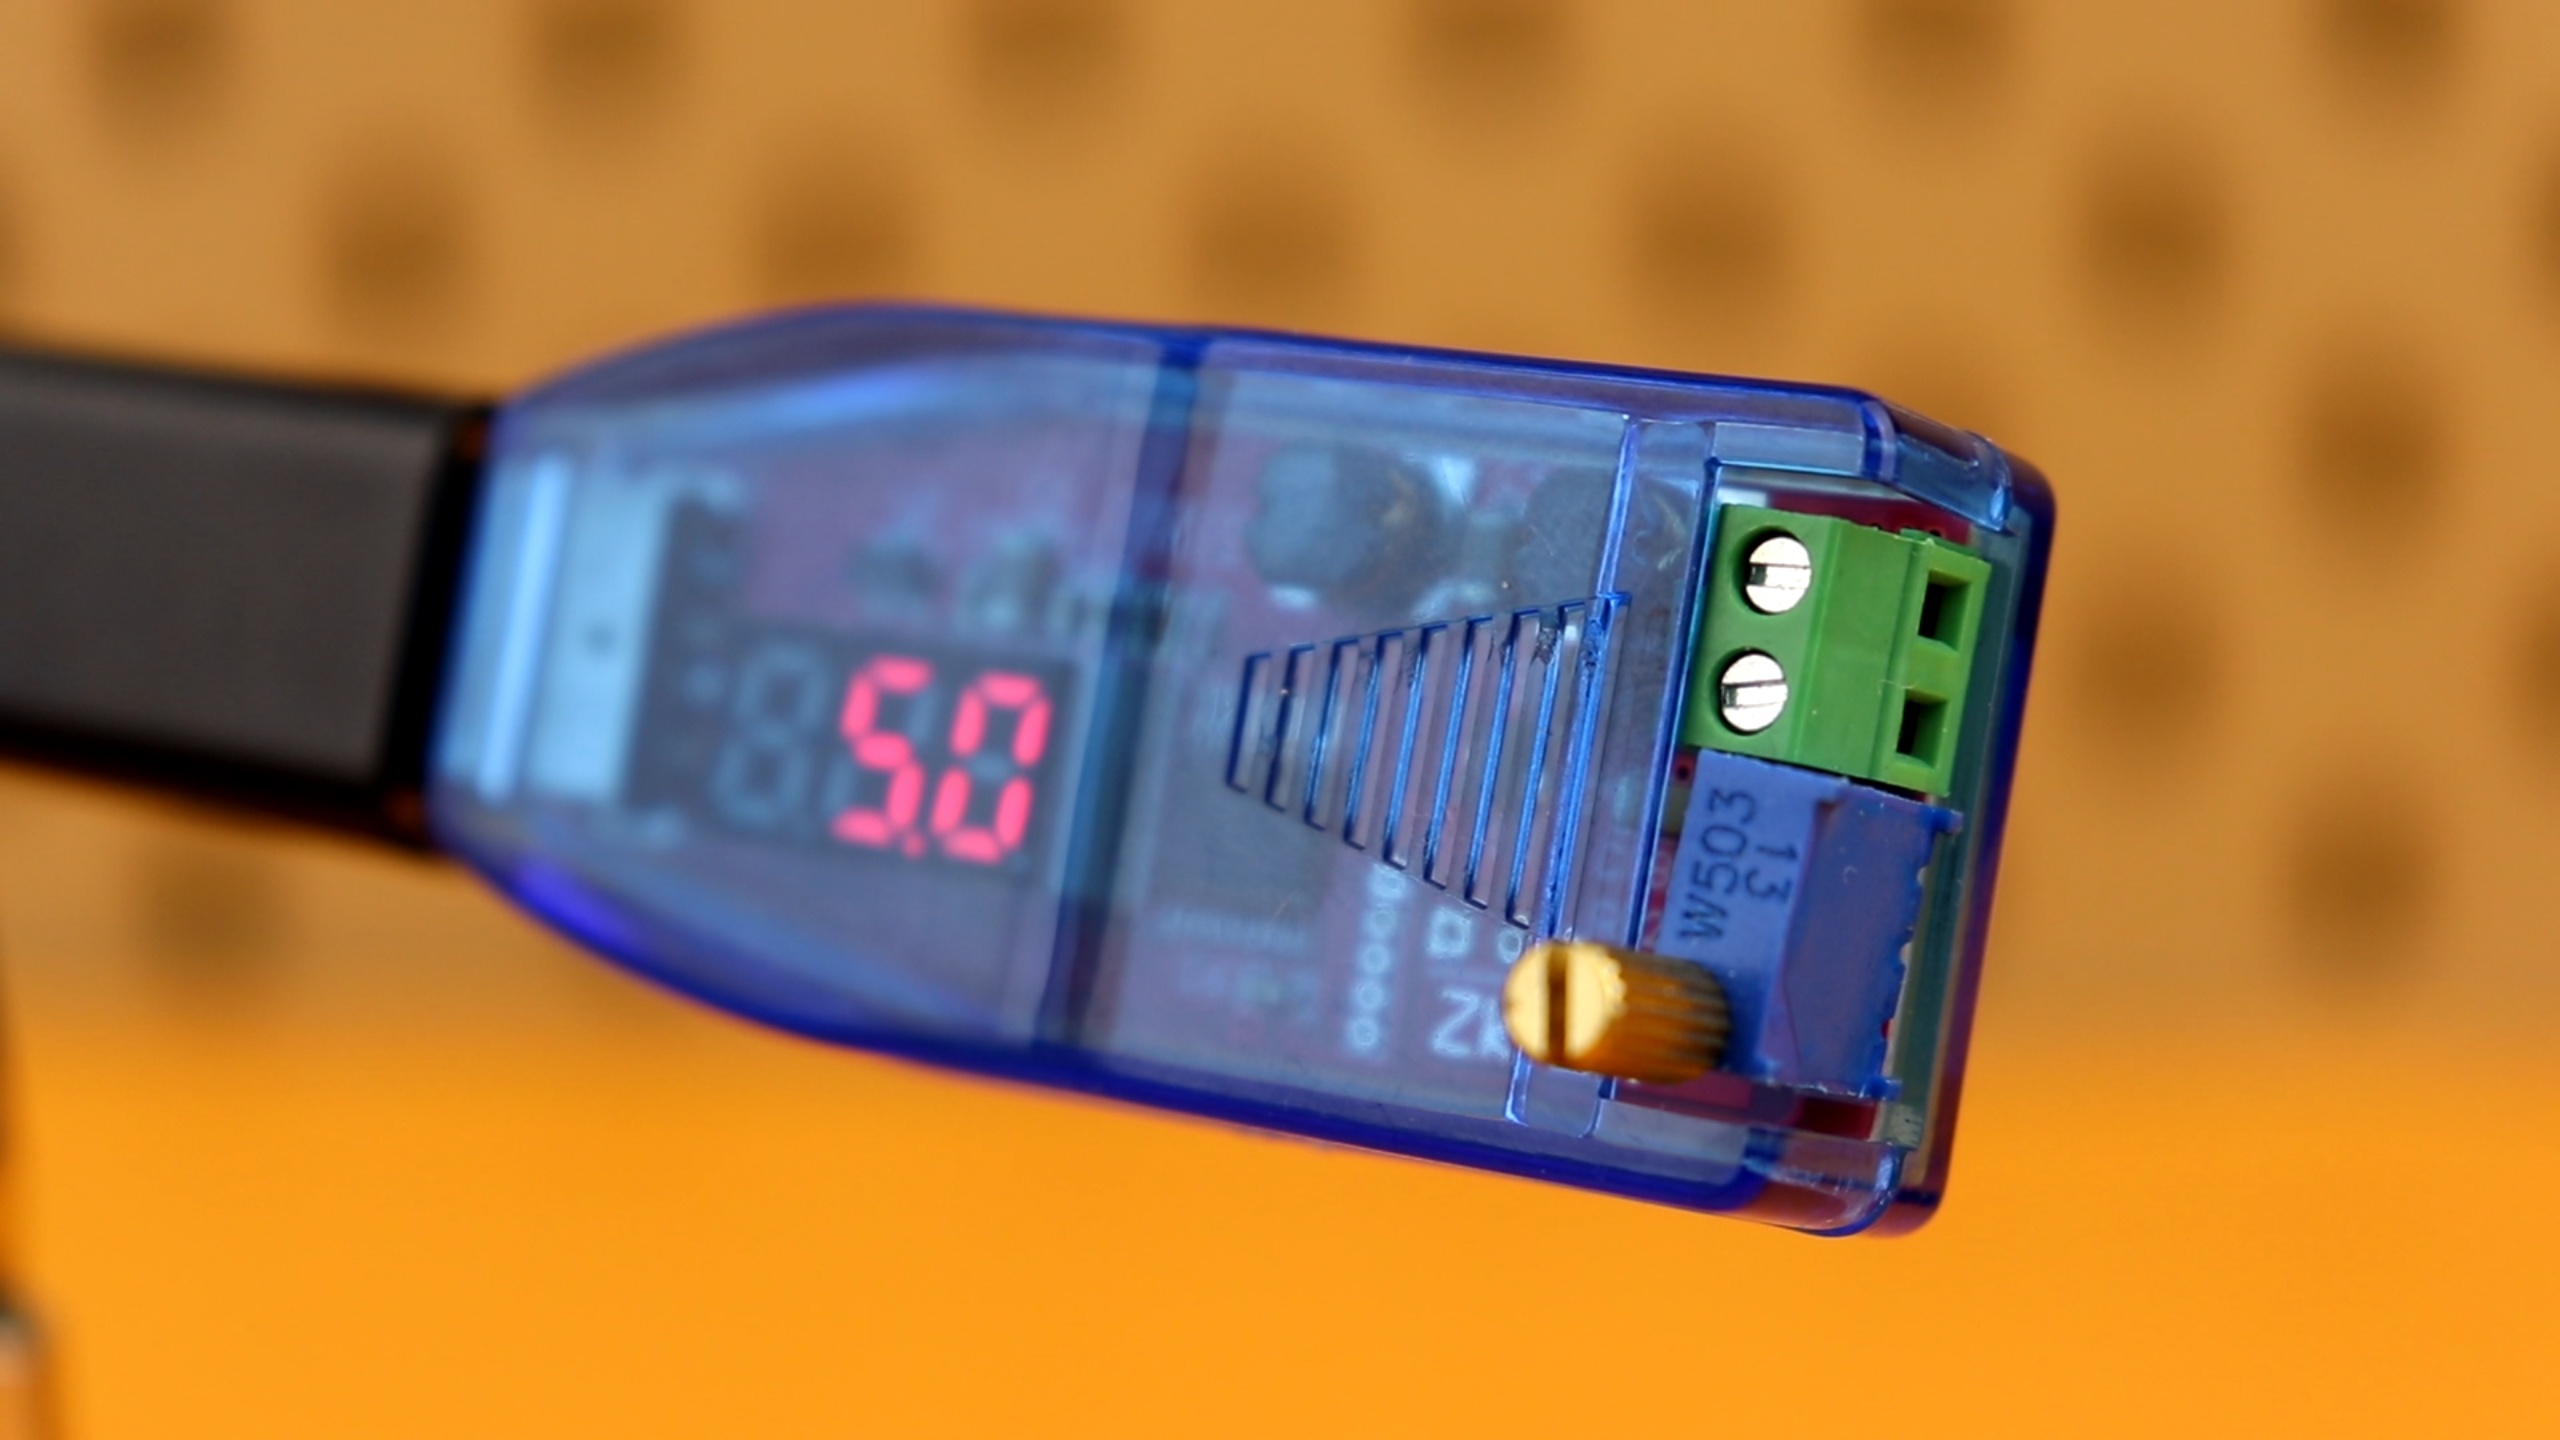
Fair warning: these power supplies work rather well for small currents, but they have their power limitations. By turning the knob you can adjust their output voltage from 1V-24V, and the screw terminal lets you access that voltage and you can use simple wires to connect it to your breadboards.
PICkit3
Because I use a lot of PIC microcontrollers I wanted to have a PIC programmer included in the tray lab, and I decided to go with the PICkit3:

It is no longer sold directly by MicroChip, but you can still find clones of this device online. Alternatively, you can also spend a bit more money and purchase the PICkit4, but for me this does not (yet) make sense. If you want to learn more about how to use the PICkit3, you can check out this article here on how to set up the PICkit3.
Voltmeter & amperemeter
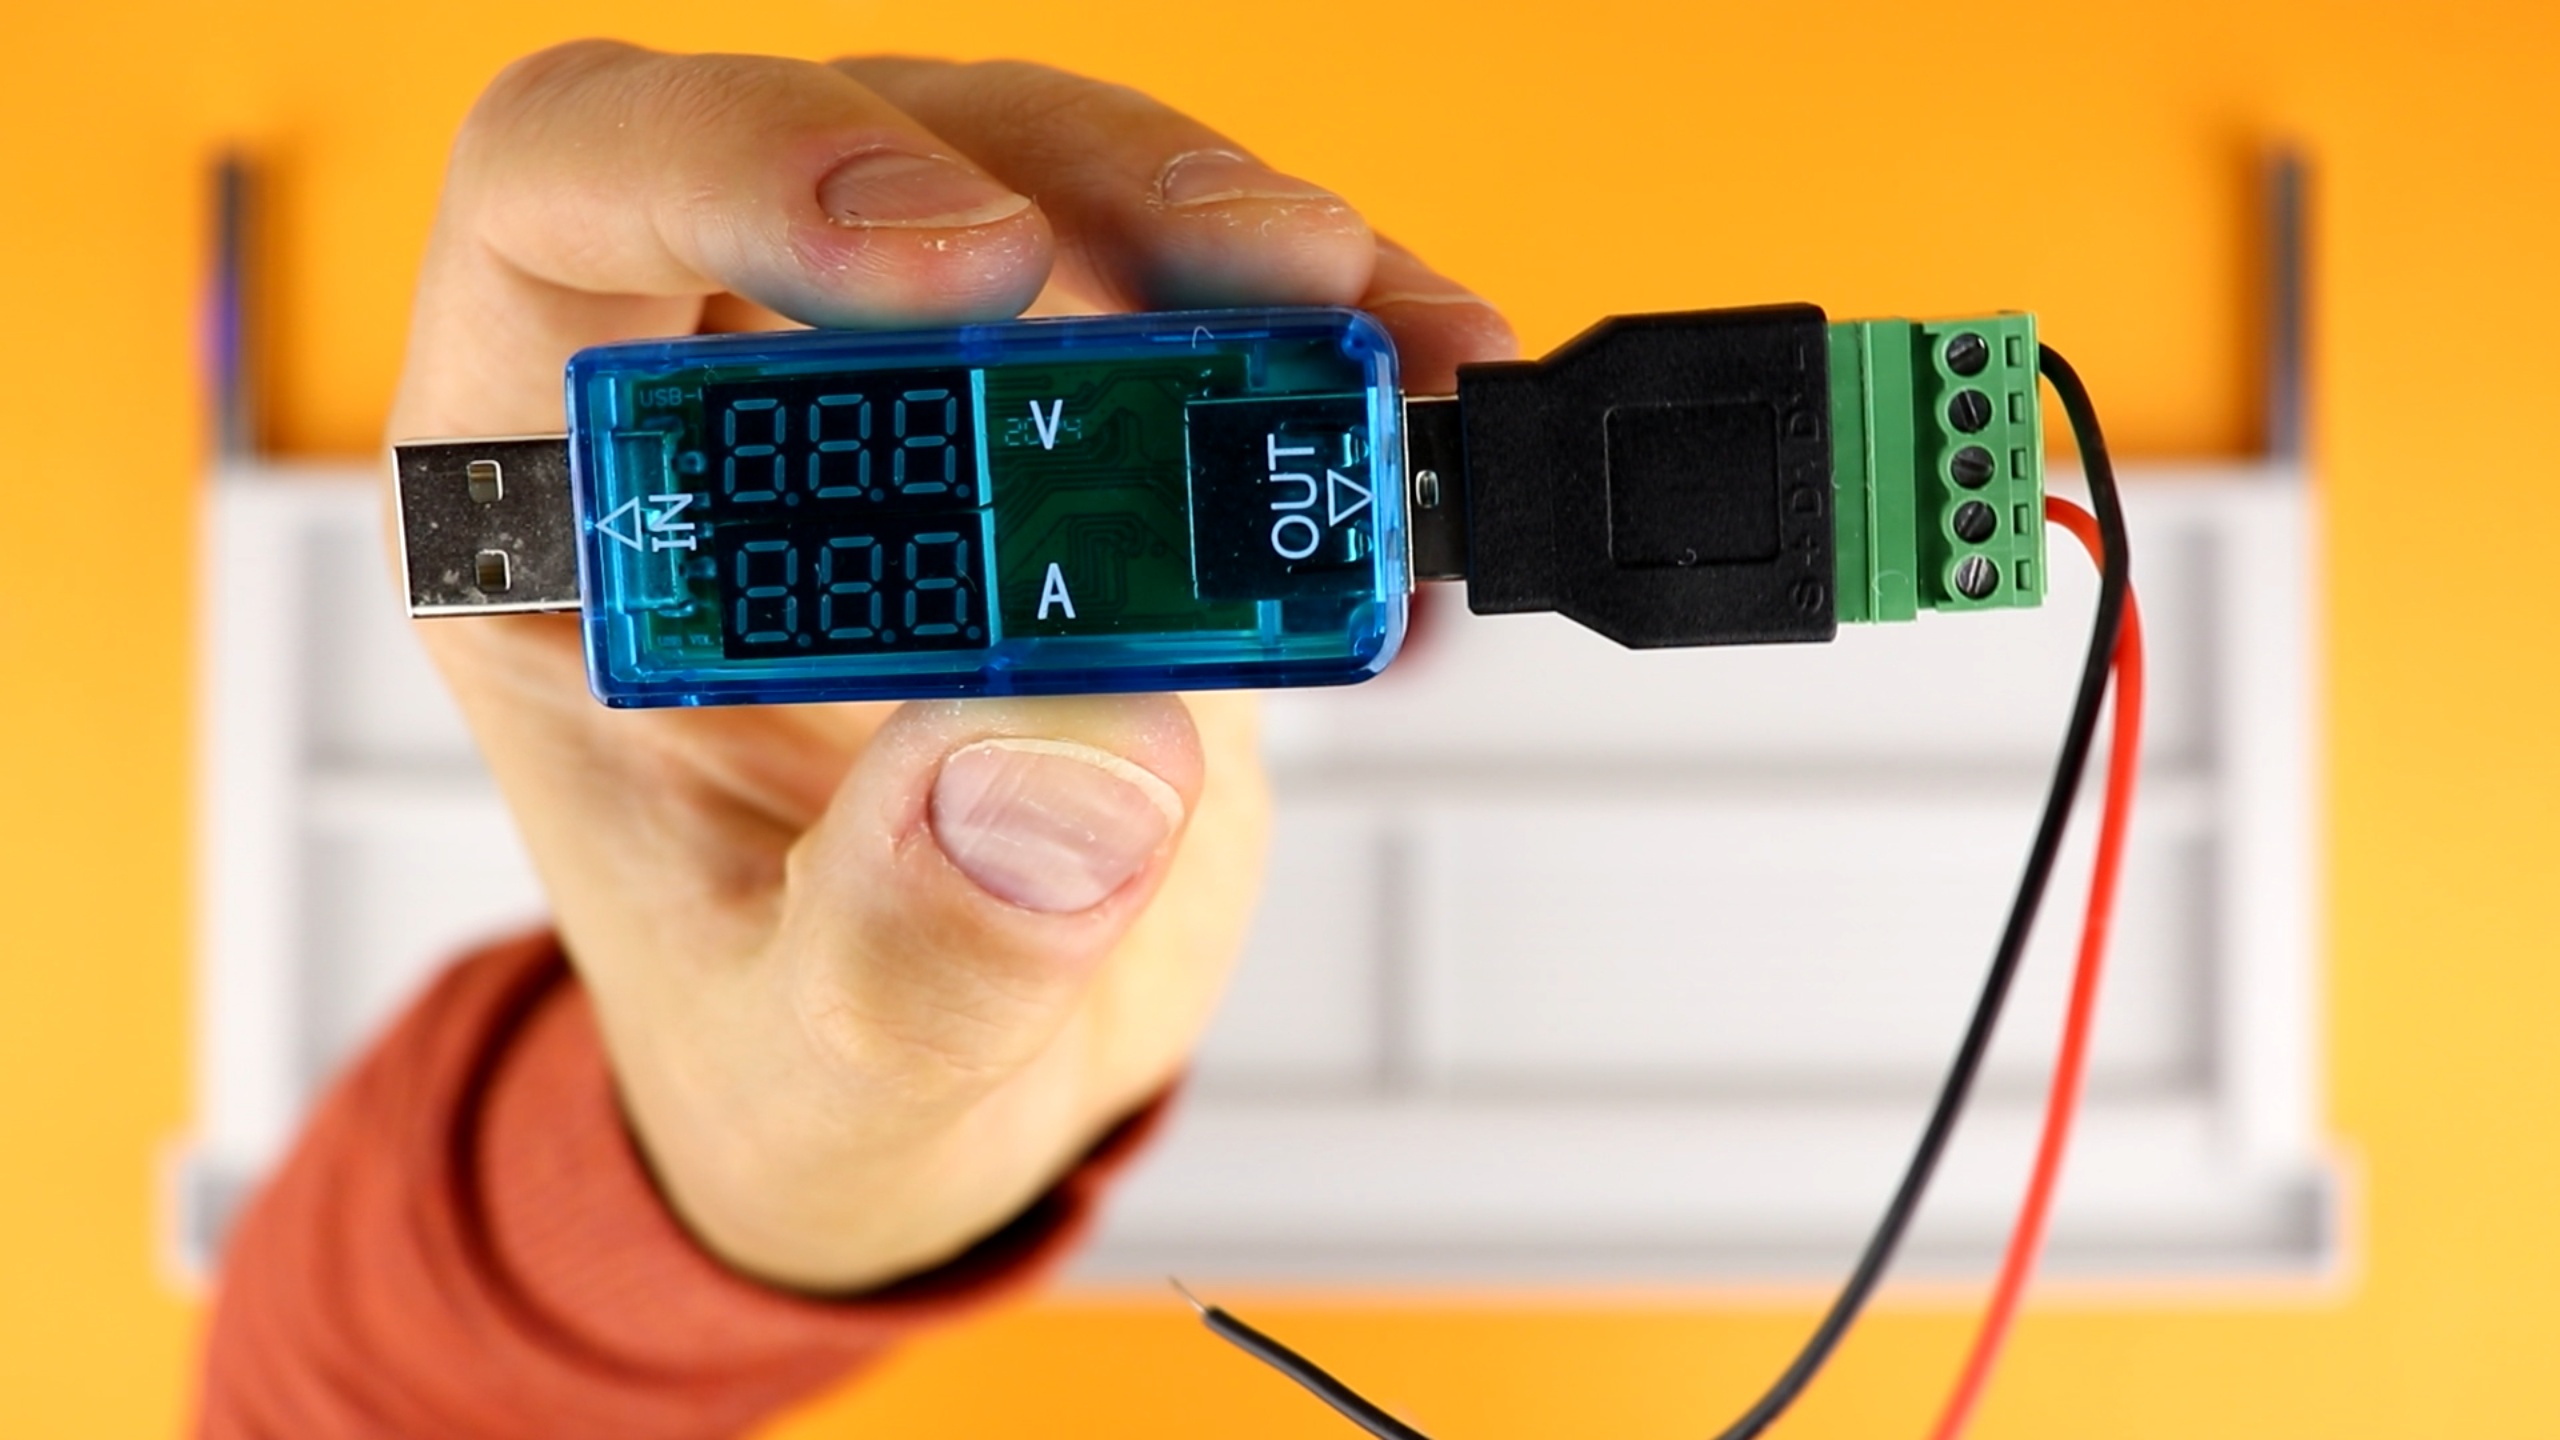
It's always a good idea to know how much current a circuit draws, and if the voltage is breaking down or not. For that reason I recommend to include a simple voltmeter/amperemeter in your electronics lab, and here you can see a simple USB voltmeter/amperemeter:

It measures the voltage of the USB connection, which should always be close to 5V, and the current that is being drawn. In this lab, I use it in combination with the USB breakout adapter, but you can plug it in anywhere you want of course:
Now this is of course not a replacement for a proper multimeter, and if you want to stick with electronics you should most definitely get a dedicated multimeter at some point, but it will get you started and it will help you monitor the basic power consumption of your circuits.
Logic probe
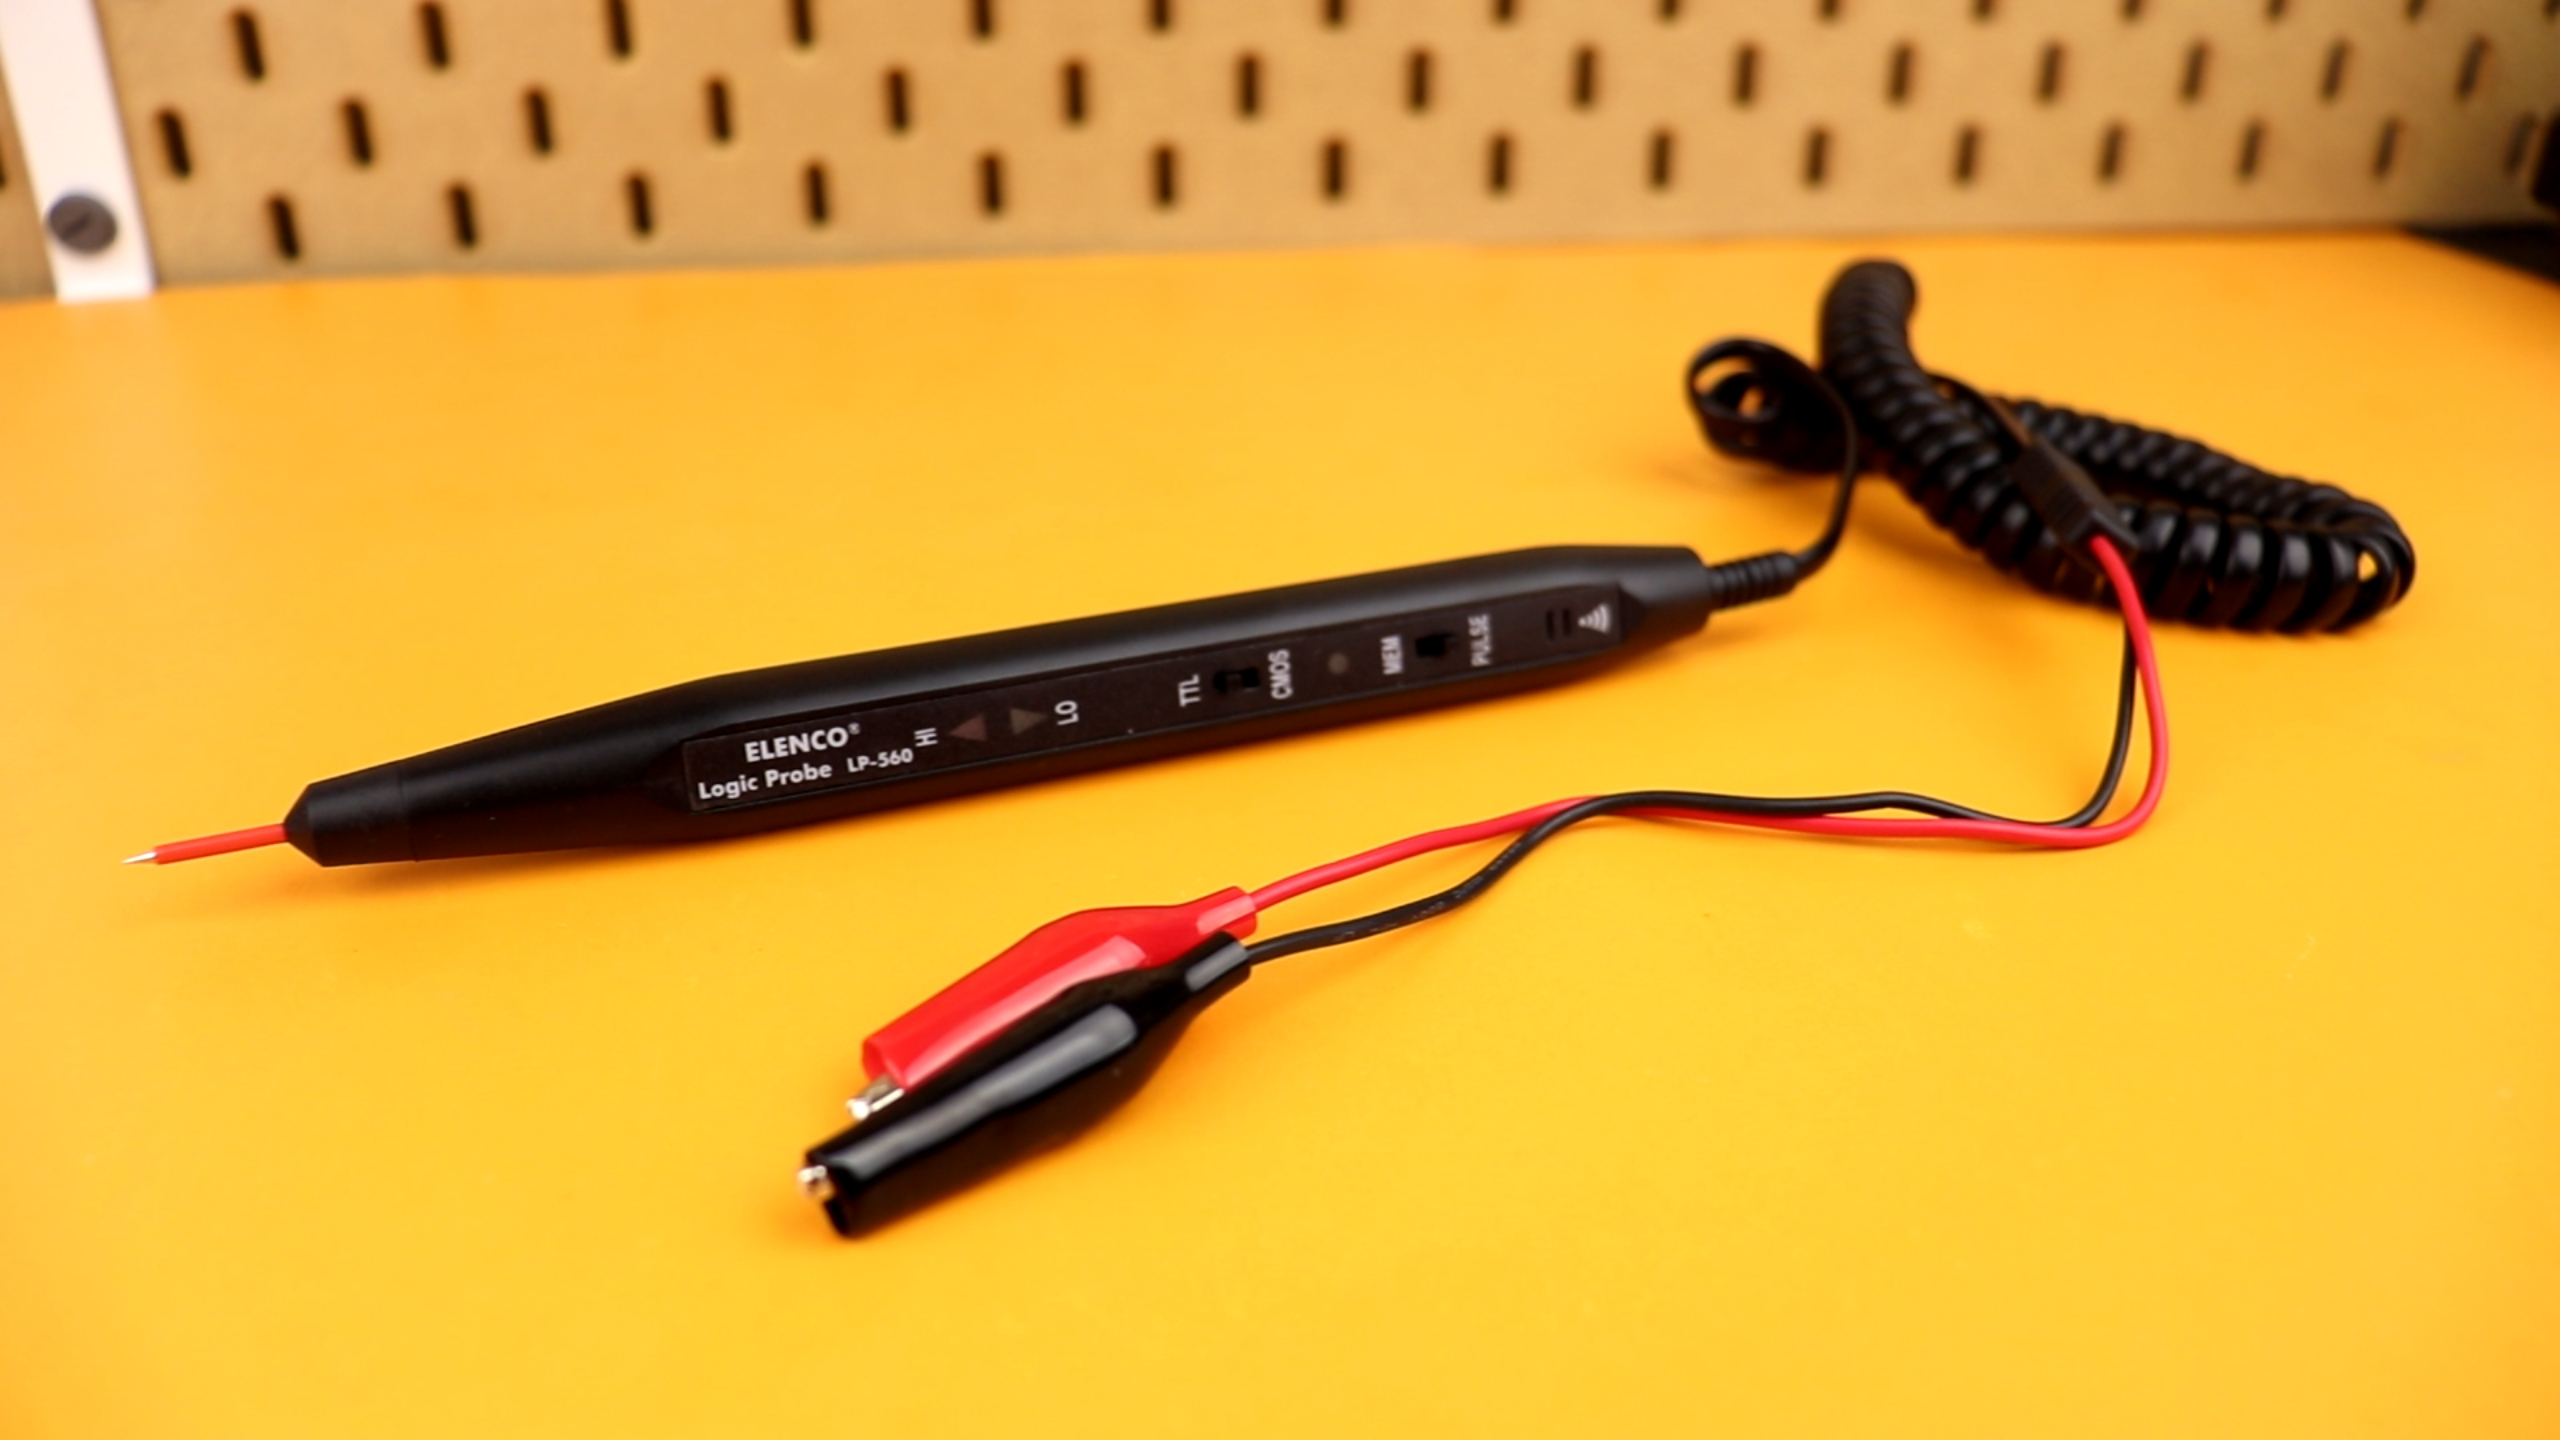
Now especially with microcontrollers it can be very helpful to use a logic probe. This is a device that lets you measure low and high voltage levels, simply by connecting its two leads to VDD and ground, and then by touching any part of the circuit with the tip of the probe:
Here you can see the logic probe in action:
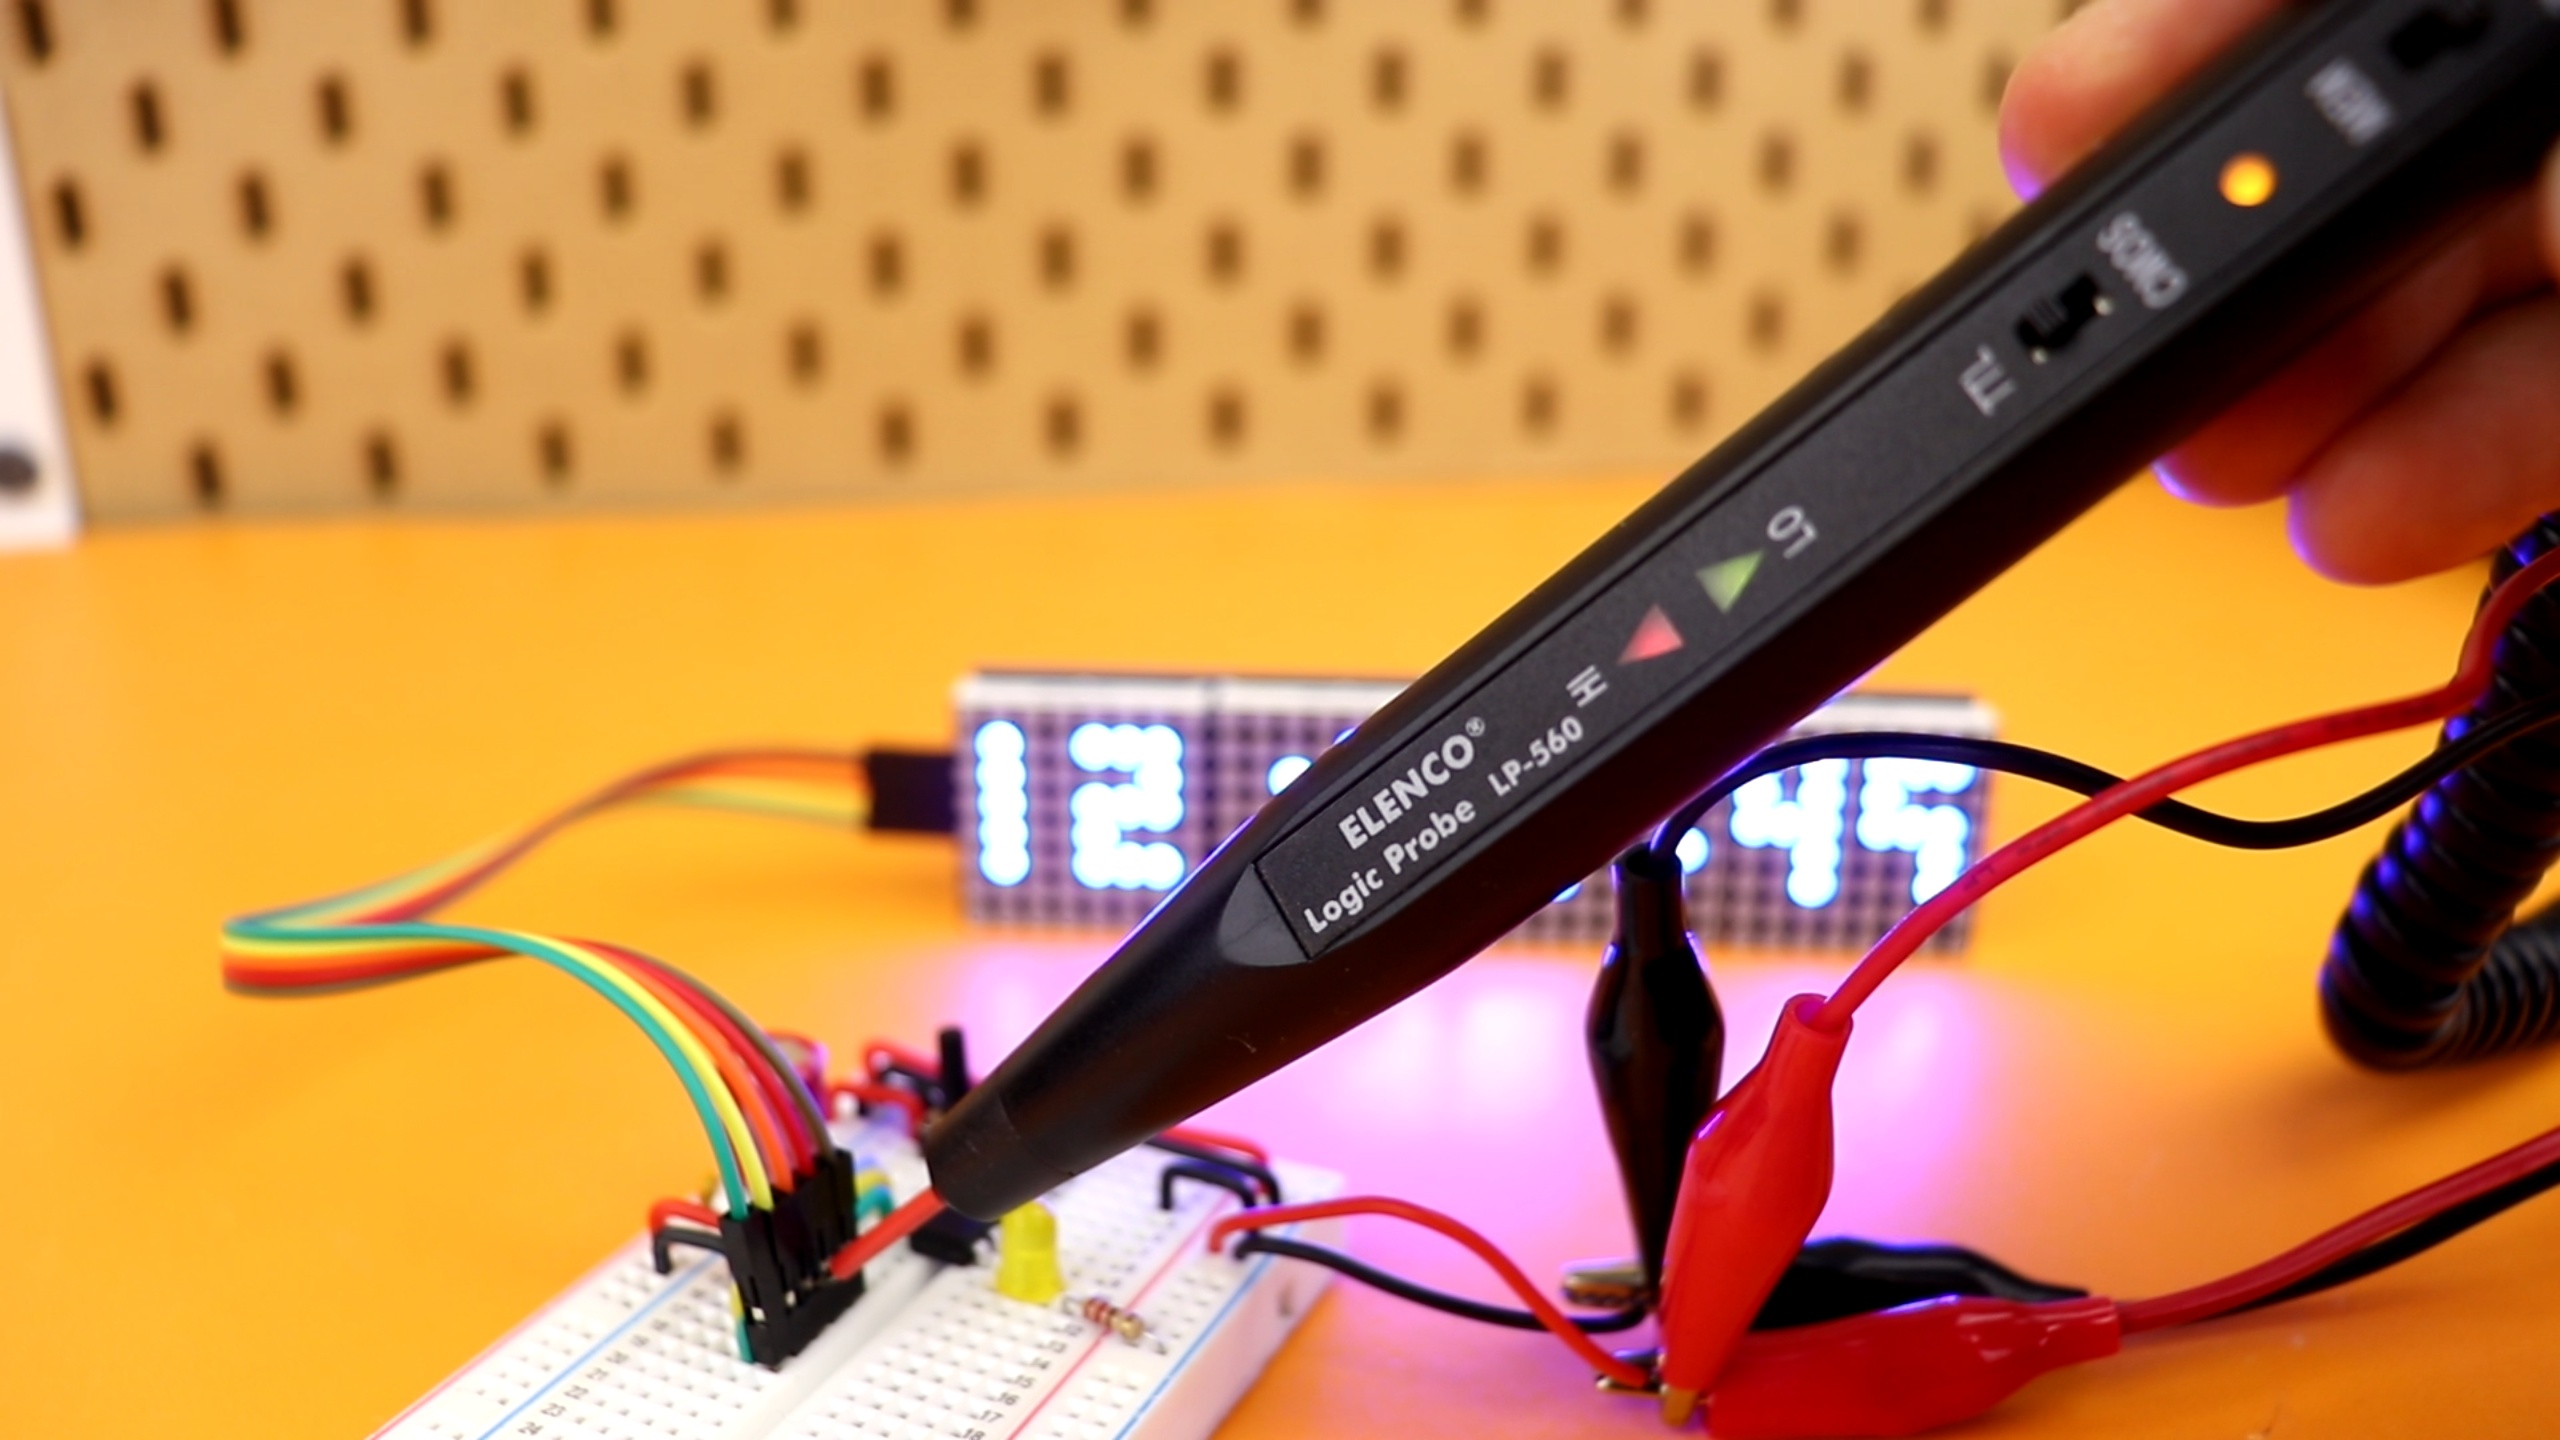
The red LED turns on whenever the probe detects a high signal, the green LED turns on whenever the signal level is low instead, and the yellow LED flashes when there is a rapidly changimg signal. A logic probe is a great diagnostic tool that I recommend to anybody who wants to get started with microcontrollers.
YouTube video
I covered this entire tutorial in a dedicated YouTube video:
Final thoughts

Here you can see the final product, our brand new tray lab, in front of my regular lab :)
I really do hope that this article can inspire you to give it a try yourself and set up your own tray lab, especially when you want to get started in electronics. And if you decide to build your own, please share it with me on social media, I always love to see your creations! Thank you so much for reading, let me know what else you want to learn, and I will see you next time! Have a great day!